Setting up a simple homelab NAS with data-at-rest encryption

Data-at-rest encryption is an important but often overlooked aspect of home servers and NAS devices. In my case, the NAS is just a Mac Mini (Ubuntu) attached to a LAN/Thunderbolt cable, sitting on a shelf in my laboratory. That machine could be physically assaulted by anyone while I am away. For instance, an attacker could boot into a live USB and immediately gain access to all files stored in the clear.
Or another scenario: when I graduate, I might forget to wipe the NAS and simply leave it behind at the institute. This was the case with the two previous owners of the machine from two different periods in 15 years, as their OSX user accounts were still accessible when I dug the Mac up from dust. This Mac was too old to even have iCloud protection.
Even if I format the drive, without overwriting it with zeros or random data, it’s possible for the machine to become a testing subject of some curious student researching information security living 10 years in the future.
To protect against such situations, we can apply data-at-rest encryption.
1. Preview of final setup
The most general setup is to have a file vault that can be unlocked with a password.
The goal is simple: data is only readable when we explicitly unlock it, and remains unreadable in every other case.
The final configuration looks like this:
-
A file server that serves over SFTP, writing to an encrypted LUKS volume separated from the OS volume.
-
For convenience, the vault is automatically mounted on login/connect, and unmounted after the last session closes, all without issuing extra commands.
Authentication is primarily through a passphrase.
-
Only the data container is encrypted; the OS volume is unencrypted.
Since the OS volume is not encrypted, while your data is safe at-rest, it is not hardened against deliberate professional attacks.
An adversary could still boot into a live environment, plant malicious scripts onto the host OS only waiting for victim to log in again. The scripts now run with full privileges as the legit user. No one could know what happens next.
2. LUKS and LVM
2.1. LUKS
LUKS (Linux Unified Key Setup) is the standard for disk encryption on Linux. It enables encrypting a whole volume on disk, exposing a decrypted view during runtime that you can transparently interact with.
Under the hood, it uses the Linux kernel’s dm-crypt (cryptographic device mapping) subsystem. LUKS supports multiple keyslots (up to 32 for LUKS2), meaning you can configure up to 32 different “passwords” to unlock the same encrypted container, which is useful for redundancy.
There are two key types:
- Passphrase: the good ol’ text password
- Keyfile: any arbitrary binary file (e.g., could be a JPEG of your waifu), ideally stored on external media.
In this setup, you will need to set up at least one passphrase. Later, we will create a dedicated Linux user account to access the encrypted container. The password for this account should match the aforementioned passphrase.
A block-device encryption method like LUKS works with very little overhead (translating to faster write speed) compared to overlay filesystem methods such as gocryptfs. This is helpful if you’re working with a spinning hard drive.
2.2. LVM
LVM (Logical Volume Manager) is an abstraction layer on top of physical storage. It allows you to create, resize, and manage storage volumes more flexibly than working directly with raw partitions. For this NAS setup, LVM is optional. You can complete everything without it. You can skim through the core concepts of LVM in the Appendix.
LVM differs from Btrfs and APFS in that an LVM volume group can contain multiple logical volumes, each formatted with different filesystems (e.g. ext4, Btrfs, NTFS).
3. Setting up networking
It is more convenient to perform all setup steps remotely over SSH. Note that these steps are specific to Ubuntu as of 24.03 LTS.
3.1. Enabling firewall
|
|
3.2. Configuring a static IP address
The preferred method is to assign a static IP through your router’s configuration. If this is not possible, you may configure it directly on the host as a workaround:
Create /etc/netplan/99-static-ip.yaml with the following content. Replace ens9 with your actual network interface and yy with the subnet mask.
|
|
Then apply the configuration:
|
|
ping 8.8.8.8 to see if you can connect to the internet.
4. Preparing the filesystem
4.1. Creating a new volume
With LVM
Create a logical volume for the encrypted container, using all free space in Ubuntu’s default volume group (ubuntu-vg). Replace data-lv with any name you like.
|
|
The corresponding block device for this logical volume would be available as /dev/ubuntu-vg/data-lv.
|
|
Without LVM
Just use gparted to spare a normal sdaX partition from your disk. You don’t need to format it with ext4 or btrfs yet.
4.2. Format and open the LUKS container
Format as LUKS
Instead of putting a regular filesystem directly on sdaX/logical volume, the first step is to initialize it as a LUKS container. This marks the volume (called the target block device) as encrypted and requires a passphrase for access.
|
|
Exposing plaintext view
After formatting, the LUKS device must be opened. Replace luks-decrypted with any name you prefer.
|
|
A new virtual volume (as a block device) /dev/mapper/luks-decrypted will be available. This is the unencrypted view of your encrypted volume. Any operation on this decrypted view will result in data being processed on-the-fly to the actual encrypted block device. This whole process happens inside the kernel.
Now you can actually format this virtual view like any normal disk drive.
Put a filesystem onto the decrypted view
|
|
Then mount it.
|
|
Refer to here for the explanation of nodev,nosuid options.
|
|
On Ubuntu, you should be able to see the lost+found folder (created by default on ext4).
Summarizing
Now there are too many paths to keep track of. Here is a brief summarization:
/data: the mount point/dev/mapper/luks-decrypted: the virtual binary block device that serves as a decrypted view of your vault. This is mounted to/data/dev/sdaXor/dev/ubuntu-gs/data-lv: the binary block device that represent a physical partition on disk, storing your encrypted data.
5. Setting up access control
Create a dedicated user (e.g. files) to own the encrypted data. Idealistically, this user should not be added into sudoers or be granted with any extra permission.
|
|
Mount the encrypted container and adjust permissions:
|
|
For now, let’s unmount and close the decrypted view.
|
|
6. Setting up automatic decryption on login/connect
Now you have successfully set up the encrypted vault. However, everytime the vault is used, you would have to manually open/mount and unmount/close it, which takes four commands.
|
|
To make our life easier, let’s setup the container to decrypt and mount automatically on login/connect, and automatically dispose itself afterwards. This works for both normal shell login (including over SSH) and SFTP-based file transfers such as over scp, rsync. Rclone also works well.
You will only need to enter your password only once during SSH authentication.
The same password will be used to unlock the vault (given that you have set them up to be the same).
First, get the logical volume’s UUID. Note that you issue the command on the target block device, not the LUKS mapper:
|
|
Setting up pam_mount
|
|
Add the following line to /etc/security/pam_mount.conf.xml under Volumes definitions. Replace user, crypto_name with your values if applicable.
|
|
Check the results
Now check if it automatically mounts on login:
|
|
Upon exit, the /data mount point should now be empty.
|
|
7. Client-side connection
Now fire up a terminal from a remote machine and try:
|
|
You should see the container being automatically decrypted over ssh.
It also works for rsync or scp.
|
|
And also rclone with an SFTP target.
|
|
ls it yourself in SSH to ensure your pam_mount setup works.-
Messing around with pam and pam_mount to see if it can interop authentication with your protocol
-
Simplifying the setup: enter the passphrase manually once on system startup and share the drive over another protocol.
This still ensures data is safe at-rest, but the container does not automatically lock after use.
To use it on the native file browser, check out osxfuse/sshfs for macOS and winfsp/sshfs-win for Windows.
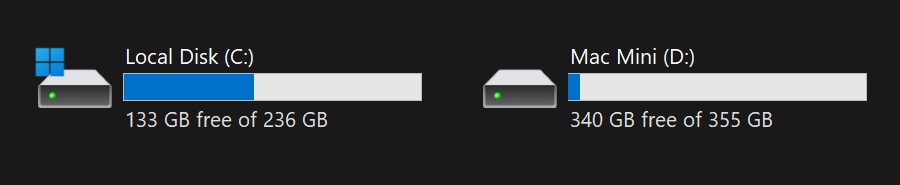
Look at that. A remote LUKS volume identified as a local disk on Windows
8. Further reading
A. Appendix
Appendix: Comparison vs. gocryptfs
Gocryptfs is a userspace tool that also works by exposing a transparent decrypted view of an encrypted folder (not a disk) using FUSE. It also works with pam_mount, and I actually tried it before switching to LUKS.
The drawback is that write performance to the encrypted folder is significantly reduced after the container grows to a certain size (for my particular hardware it is just 15 GB), making the method impractical for transferring large amounts of data. Read performance is acceptable. You may or may not encounter this on more modern hardware.
While the practical write speed of the 2.5" HDD on the local filesystem is over 70 MB/s, the local write speed to the gocryptfs container just hovers at around 10 MB/s-30 MB/s, let alone network transfer. CPU does not seem to be the bottleneck here. But let’s try it anyway:
- First, let’s try copying to the plaintext home directory.
1 2 3 4 5 6$ rclone copy -P ~/Downloads/archlinux-2025.08.01-x86_64.iso CONFIG-NAME: Transferred: 875.188 MiB / 1.284 GiB, 67%, 60.899 MiB/s, ETA 7s Transferred: 0 / 1, 0% Elapsed time: 14.4s Transferring: * archlinux-2025.08.01-x86_64.iso: 66% /1.284Gi, 60.899Mi/s, 7s - Next, to the LUKS container
1 2 3 4 5 6$ rclone copy -P ~/Downloads/archlinux-2025.08.01-x86_64.iso CONFIG-NAME:/data/test.iso Transferred: 1.143 GiB / 1.284 GiB, 89%, 51.558 MiB/s, ETA 2s Transferred: 0 / 1, 0% Elapsed time: 22.4s Transferring: * archlinux-2025.08.01-x86_64.iso: 89% /1.284Gi, 51.580Mi/s, 2s - Finally, to the gocryptfs container
1 2 3 4 5 6$ rclone copy -P ~/Downloads/archlinux-2025.08.01-x86_64.iso files-macmini:plaintext Transferred: 885.250 MiB / 1.284 GiB, 67%, 29.040 MiB/s, ETA 14s Transferred: 0 / 1, 0% Elapsed time: 31.4s Transferring: * archlinux-2025.08.01-x86_64.iso: 67% /1.284Gi, 29.044Mi/s, 14s
Appendix: LVM shenanigans
This is a bad summary of the ArchWiki article on LVM.
In LVM terms, a logical volume (LV) belongs in a volume group (VG). A VG could span across one or many partitions/physical volumes (PV) (which, in turn, could lie on multiple physical disk drives).
| LVM | BTRFS | APFS |
|---|---|---|
| Volume group | Volume | Container |
| Logical volume | Subvolume | Volume |
| Physical volume | Partition | Partition |
           ┌───────────────┐
       ┌───►  Phys Volume  │
       │   └───────┬───────┘
       │           │
       │       Belongs to
       │           │
       │   ┌───────▼───────┐
  Sits │   │ Volume Group  │
 inside│   └───────┬───────┘
       │           │
       │       Contains
       │           │
       │   ┌───────▼───────┐
       └───┤  Logical Vol  │
           └───────────────┘
However, LVM differs from Btrfs and APFS, where volumes are tied to a single filesystem type. An LVM volume group can contain multiple logical volumes, each formatted with different filesystems (e.g. ext4, Btrfs, NTFS).
Example from an actual setup
In my setup, I have a one single physical drive, which is divided into three partitions/physical volumes sdaX.
|
|
Normally, sda3 would be your root partition formatted with ext4 or btrfs. When using LVM, however, a volume group is created, and sda3 becomes part of its storage pool. The logical volume holding your root filesystem is then created inside this VG.
These relationships could be seen in the commands for manually creating a VG and a LV:
|
|
If you have installed Ubuntu with LVM enabled, by default it will create the ubuntu-vg volume group. You could reuse it like I do, or create another VG.
|
|
It’s easy to recognize the VG Size matches the size of the sda3 partition.
You can list all LVs with the lvdisplay command. Here, the Ubuntu root volume is ubuntu-lv, which is part of ubuntu-vg sitting inside /dev/sda3.
|
|
If you were interact with this volume as if it is a normal block device (like formatting), it’s still there in /dev/:
|
|
You can add more logical volumes into the volume group ubuntu-vg as described in 4.1. Creating a new volume.